%201.svg)
How to Configure Step
- Purpose: This article explains how to configure a Step in the Workflow Builder. A step determines the action or delay that occurs after a trigger is activated or a previous step is completed. This guide is for users looking to automate actions or add conditional logic to their workflows.
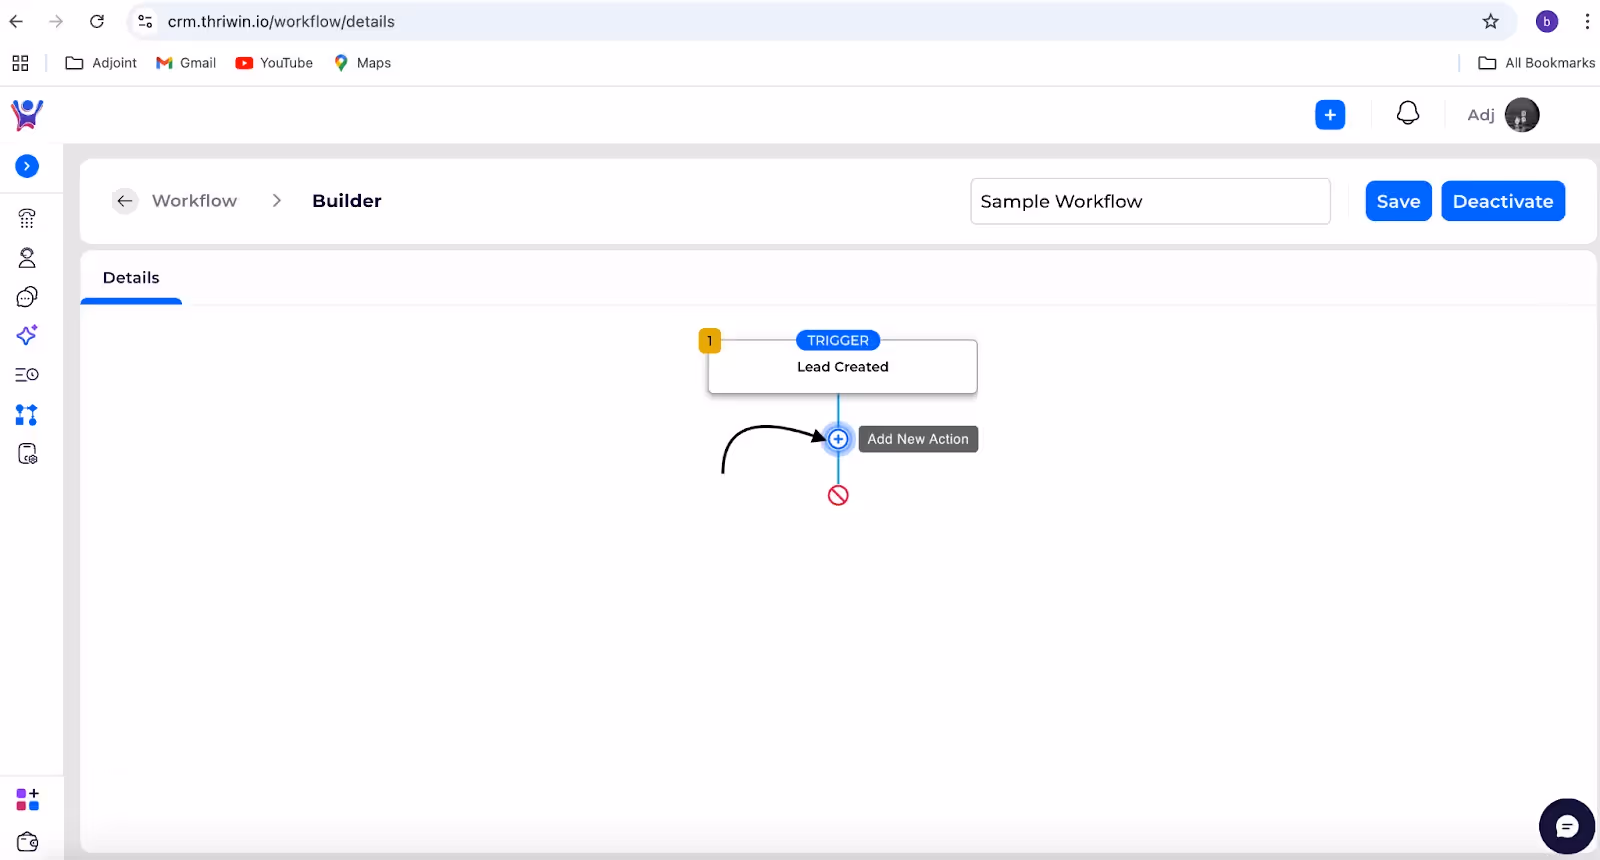
Add Step to the Workflow
- Below the trigger, you will see a + icon.
- Click the + icon to add an action or task that should execute after the trigger.
- Screenshot:
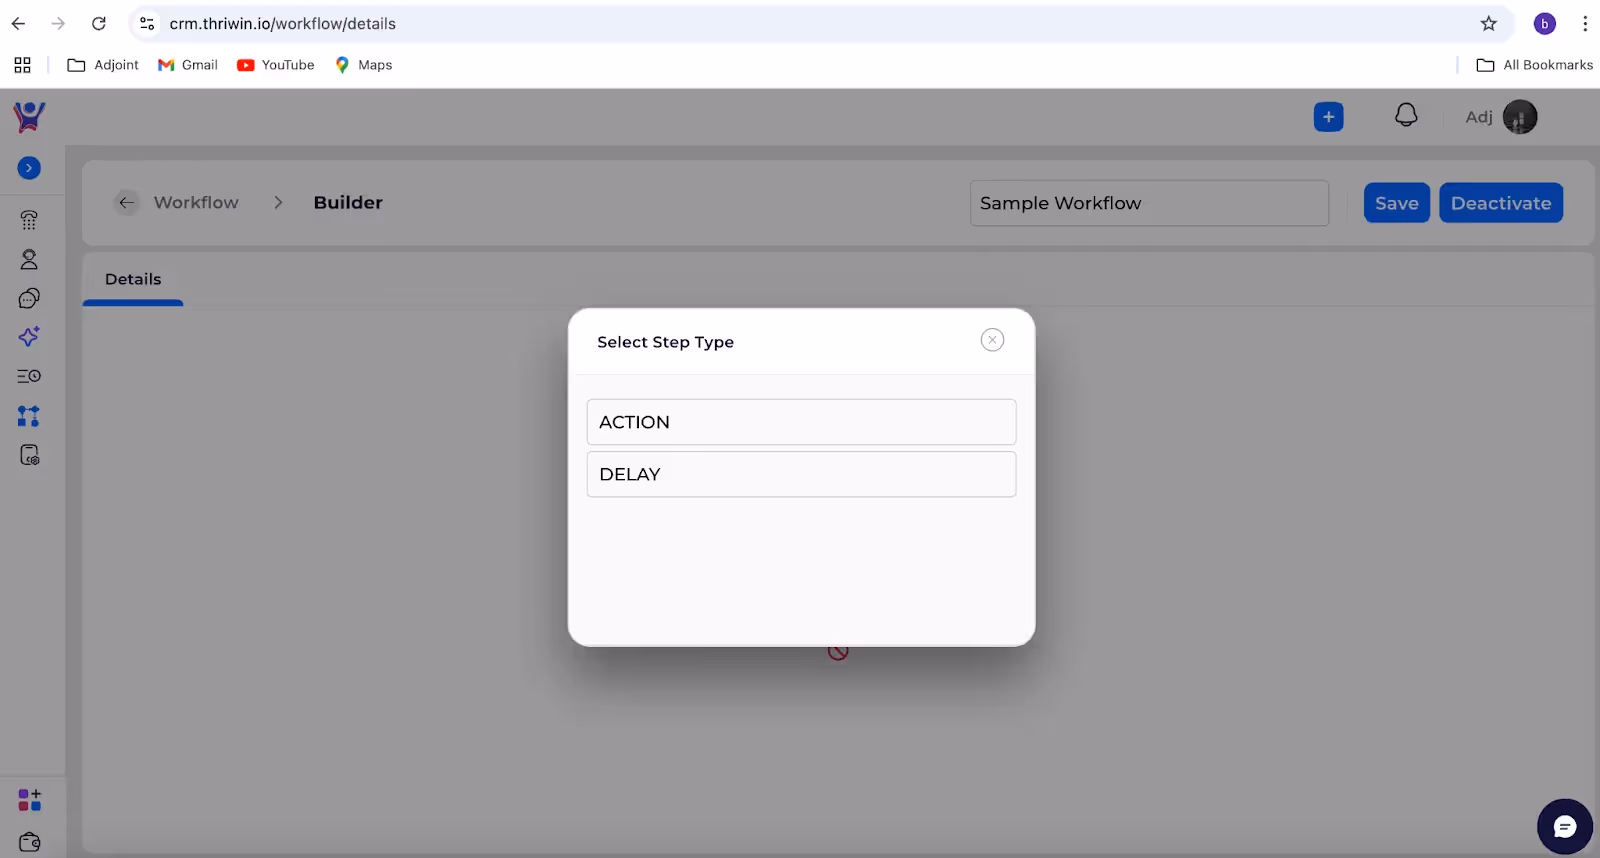
Select Step Type to the Workflow
- After configuring a trigger, click on the + (Add Step) icon in the builder interface. You will see a modal with two options
- Action: Add an immediate task such as sending an email or updating CRM data.
- Delay: Add a time gap between two steps in the workflow.
- Screenshot:
Need More Help?
Contact Support: For further queries, reach out to our Support Team.


.svg)


.svg)